
Shoelaces, also known as shoe strings, are a common feature in shoes. Whether they're work or military boots, dress shoes, or athletic sneakers, most shoes would typically have laces. They're a tried and tested technology that helps improve how a shoe fits.
Every foot is unique, which means every shoe fit should be too. The way you lace your shoes can significantly affect these factors:
Fit: Laces help alter how the shoe wraps around the foot and improve feet
Adjustment: Lace pattern and lacing methods can be used to address issues like heel slippage or poor fit for those with a wide forefoot, high arches, or a narrow foot
Comfort: By allowing tighten or loosen
Looks: Shoe laces can also be decorative, improving the overall look of your shoes
You'd actually be surprised at how wide a topic lacing shoes can be. There are dozens of ways you can lace a shoe for different purposes. But knowing how to improve your shoes' fit and comfort through lacing techniques is essential for you to enjoy your footwear.
Let's get back to fundamentals and learn how to lace shoes with some basic shoe lacing techniques.
Your Shoe and Shoe Laces
Before we jump into actual lacing, let's review the specific parts of the shoe and the shoe lace that come into place when lacing shoes.
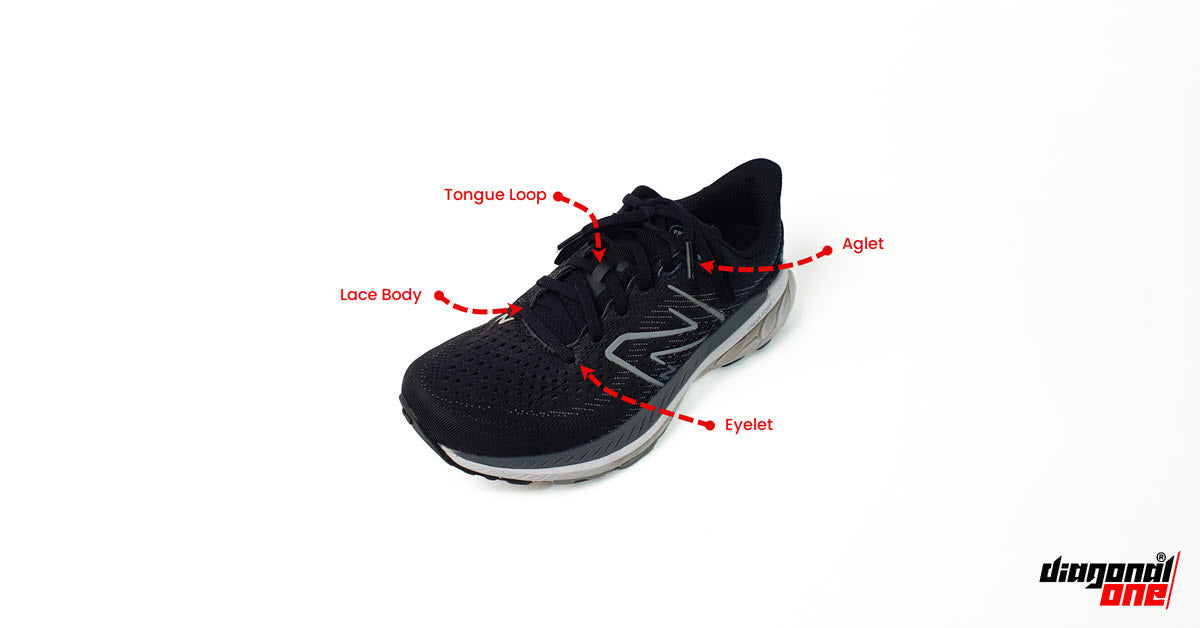
Laces: The strings themselves. They are composed of aglets (tags) and the lace body. Aglets are the stiff reinforced ends of shoe laces. They help you thread the laces into the eyelets. The lace body is the main part of the lace, they can made from cotton, leather strips, silicone, or other synthetic materials. Elastic shoe laces, for instance, can give a snugger fit than non-stretchy ones.
Eyelets: The holes around the middle section of the shoe through which shoelaces are threaded
Lace keeper or tongue loop: This is the slot or loop found in the shoe's tongue through which you can thread laces. These help keep the tongue in place and prevent it from moving side-to-side
Basic Shoe Lacing Techniques
Let's take a look at three of the most basic shoe lacing techniques: criss-cross, straight-lace, and heel-locking methods.
Criss-Cross (Standard) Method
The criss-cross method is your entry-level lacing technique. It's the one that most people learn as kids and the one that most shoes from the store come with pre laced. It's simple yet effective, providing sufficient foot support and snug fit.
Here's how to do it:
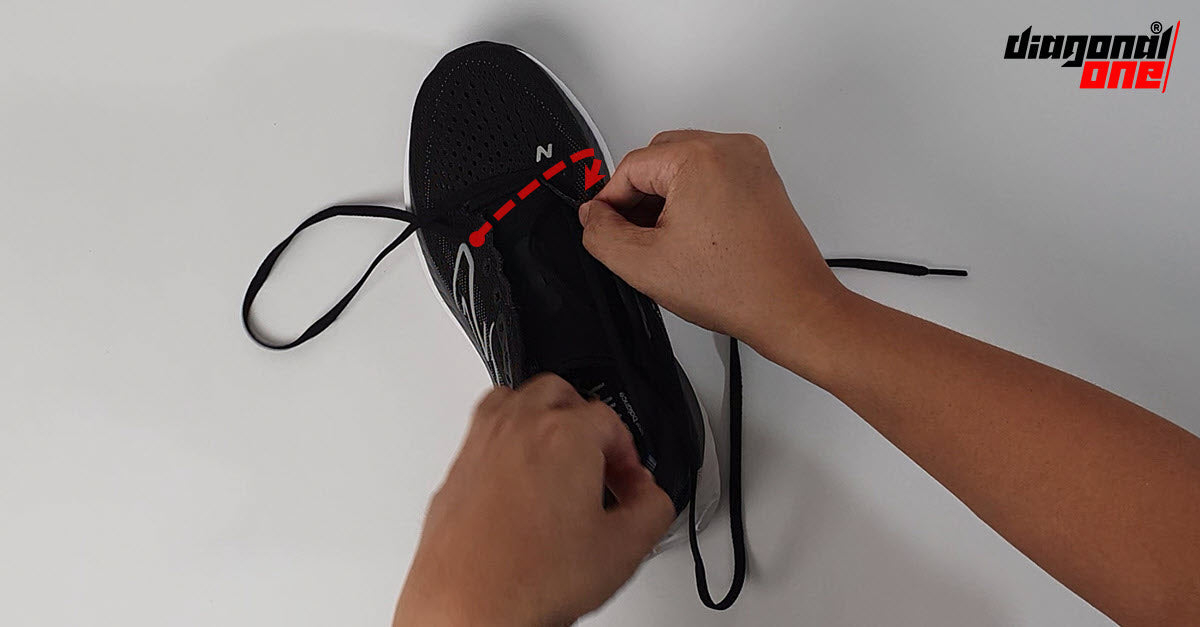
1 - Start by running the lace straight across the inside and out through the bottom eyelets.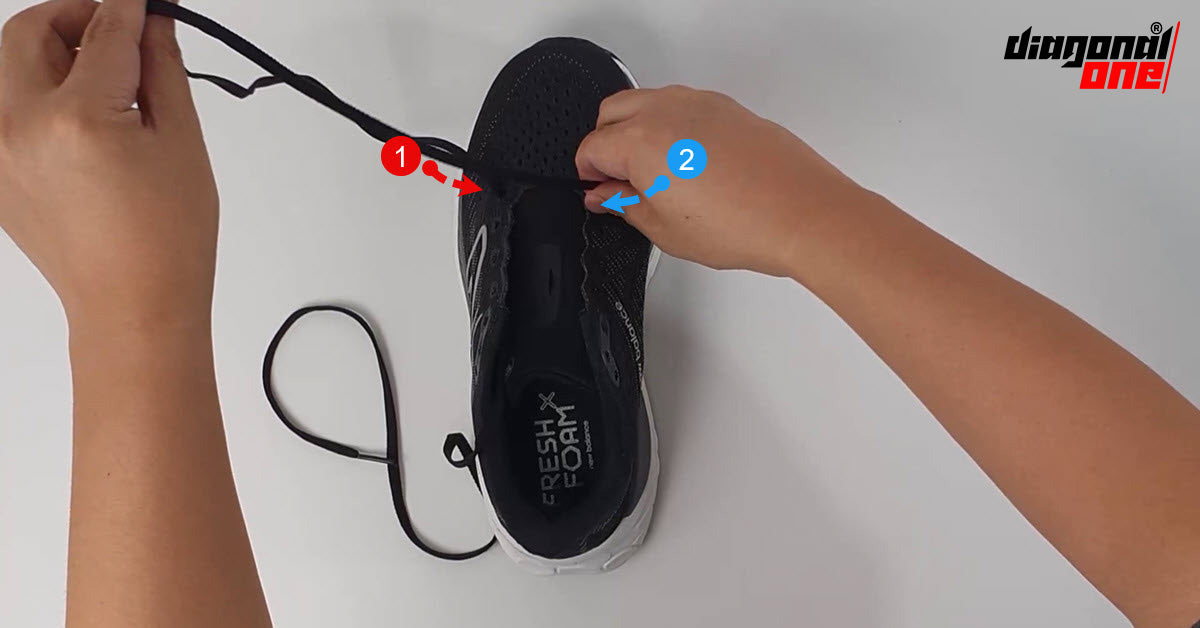 2 - Pull the lace about half-way and measure up both aglets to ensure that you have them even.
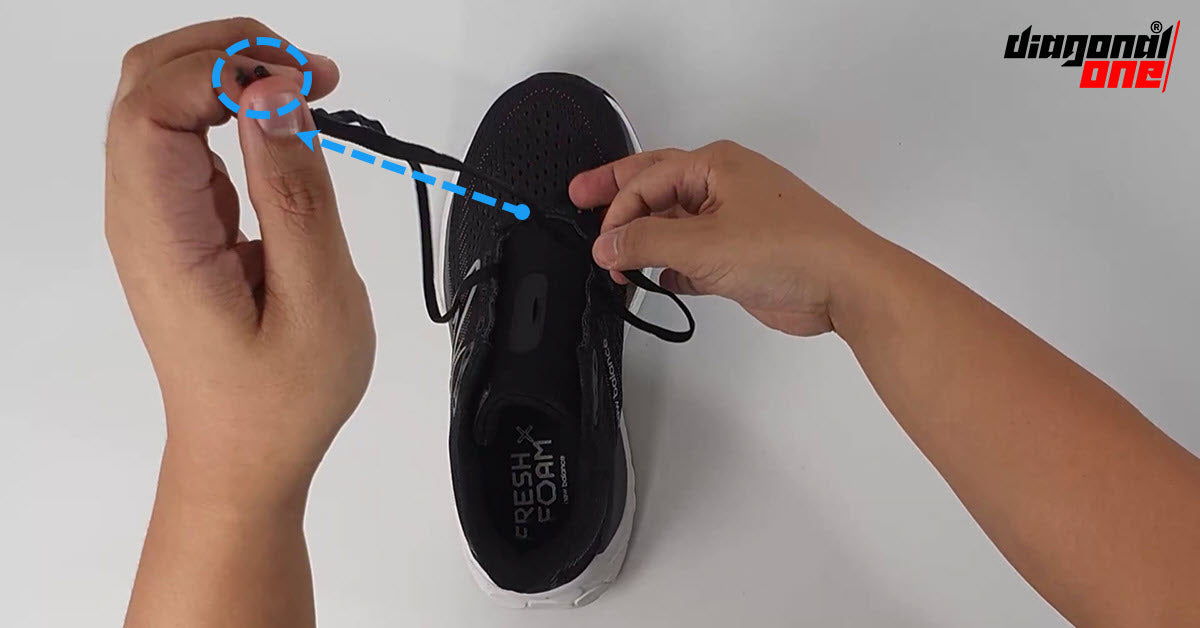 3 - Take one end of the lace, cross it over the tongue of the shoe, and feed it through the next eyelet under and up.
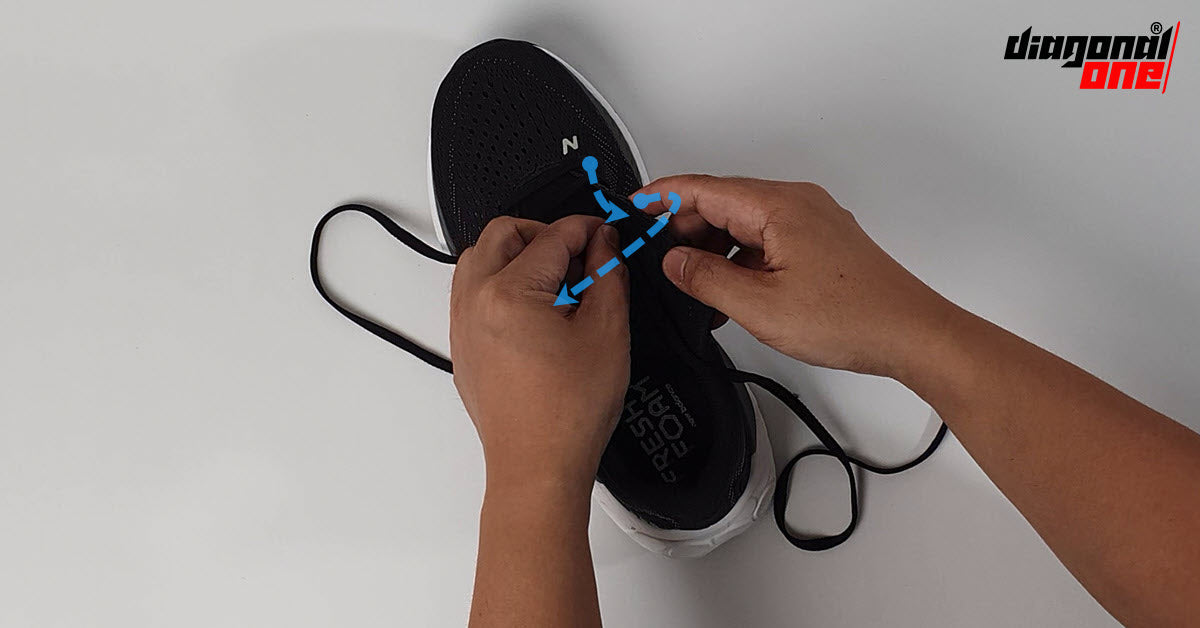
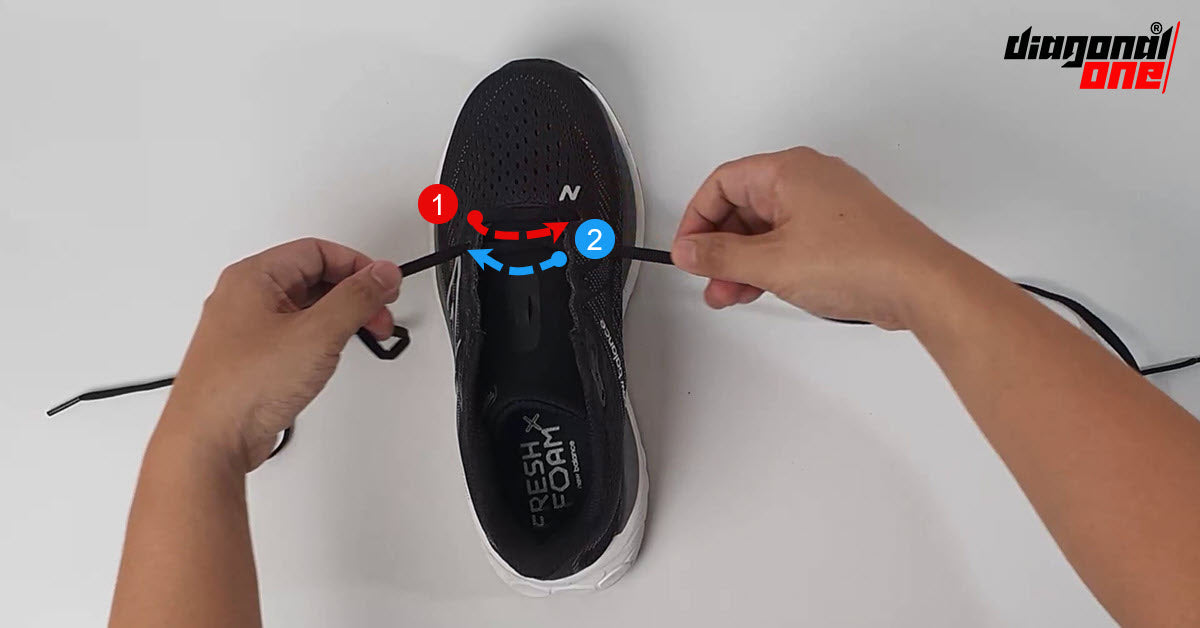
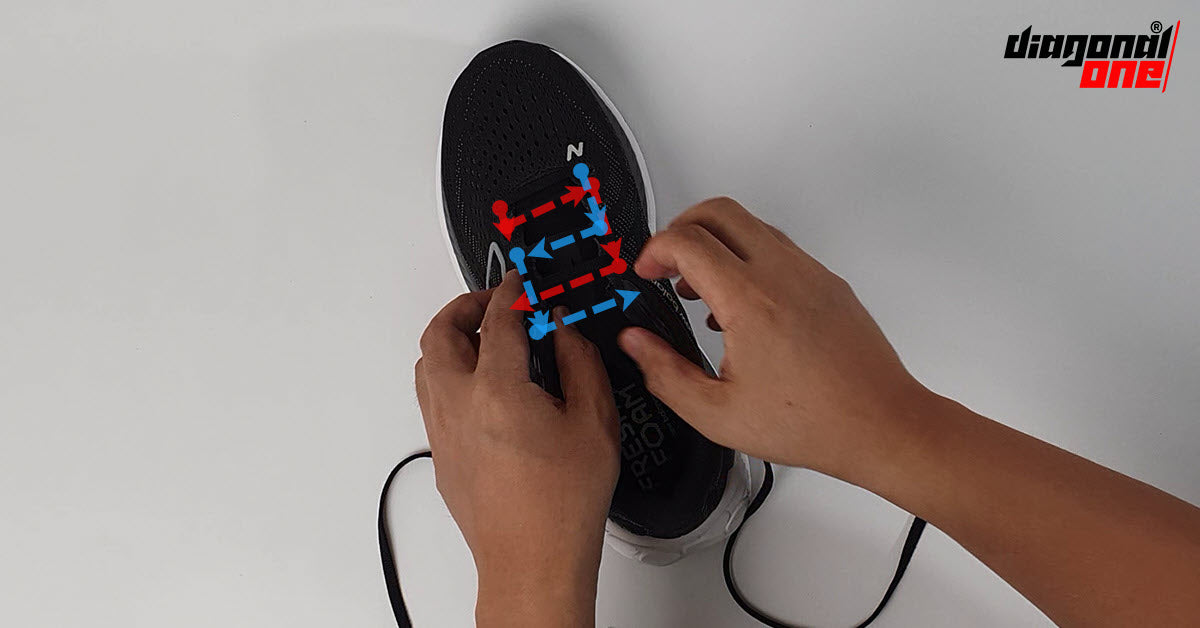
4 - Take the other end at the opposite side, and do the same. Cross the other end over and it under and up through the next set of eyelets. This will create a zig-zag or criss-cross pattern. If you reach the middle, you can choose to lace through the tongue loop.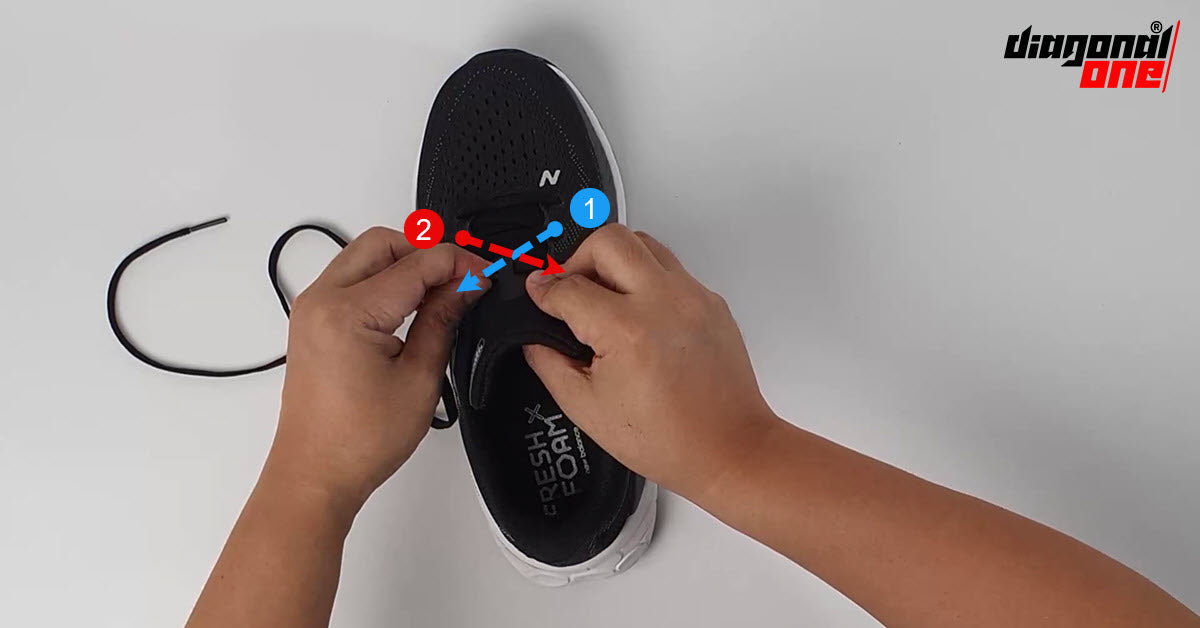 5 - Repeat until you reach the top. For athletic or running shoes, you may skip the last eyelets, as these are often reserved for the heel lock method.
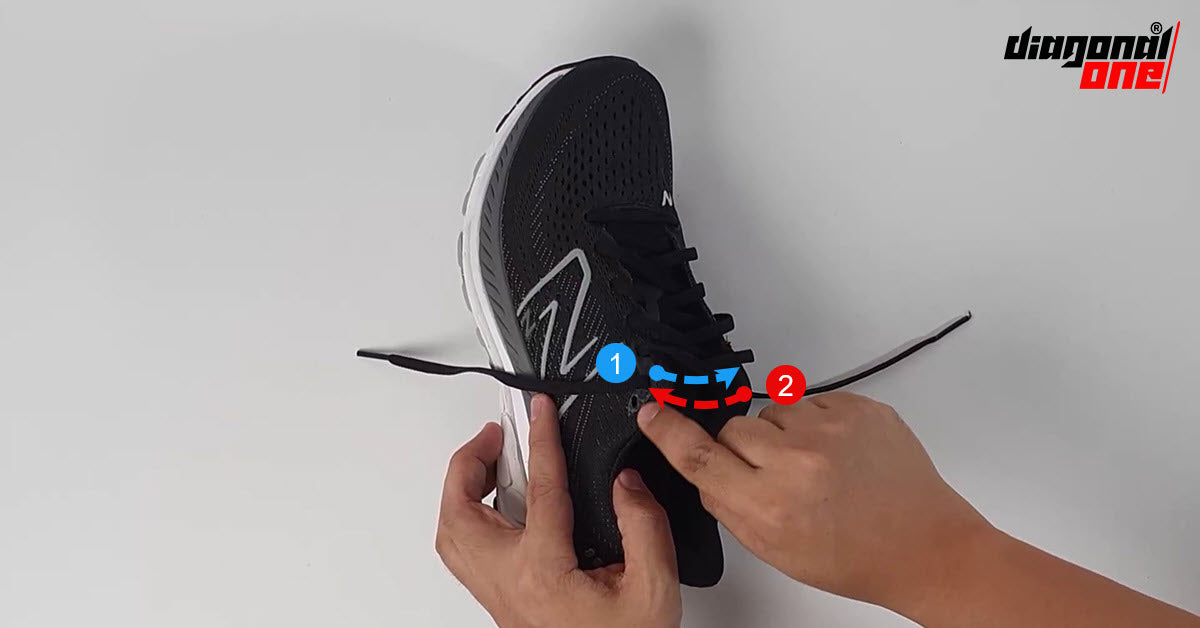
What makes this a tried and tested method is that it works very well in adjusting the tightness of the shoe. It accommodates feet of all shapes and sizes. The laces weave over-and-under which allows for easy adjustments - if your shoes feel too tight or loose, simply adjust the tension accordingly.
Heel-Locking Method
Next up is the heel-locking method. We're taking this one on next since it just adds a step to the criss-cross method. This technique is a game-changer for hikers, runners, or anyone prone to heel slippage or blisters.
Follow these steps:
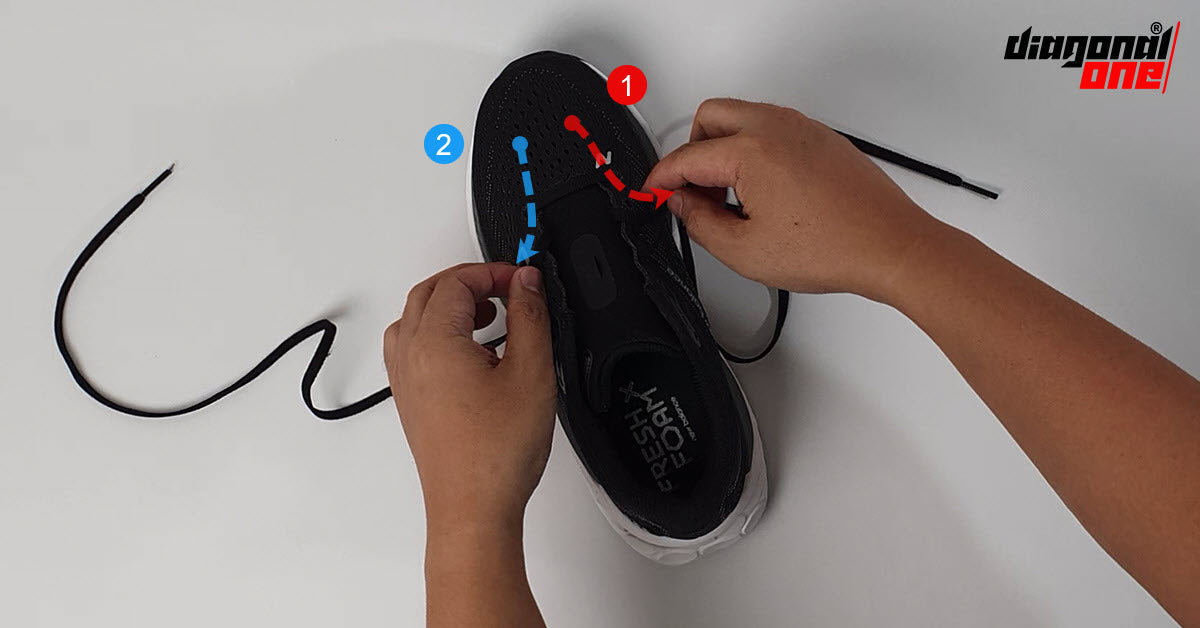
1 - Lace up your shoe as you normally would using the criss-cross method but don't use the top eyelet.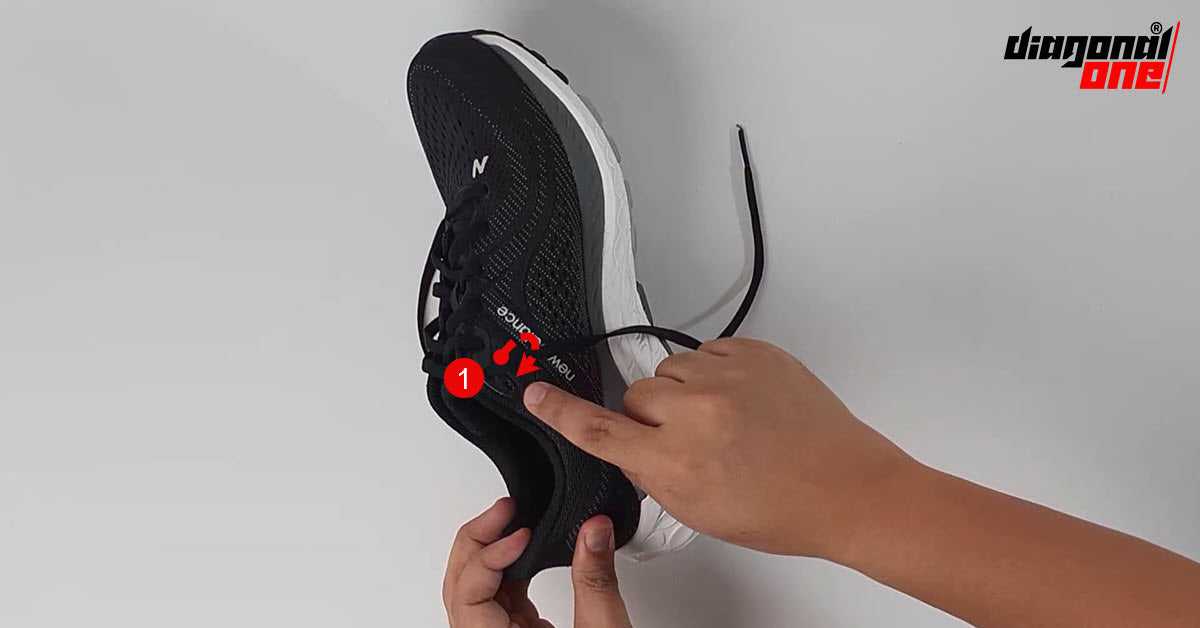 2 - Take each lace end and thread it through the last eyelet on the same side of the lace, creating a small loop.
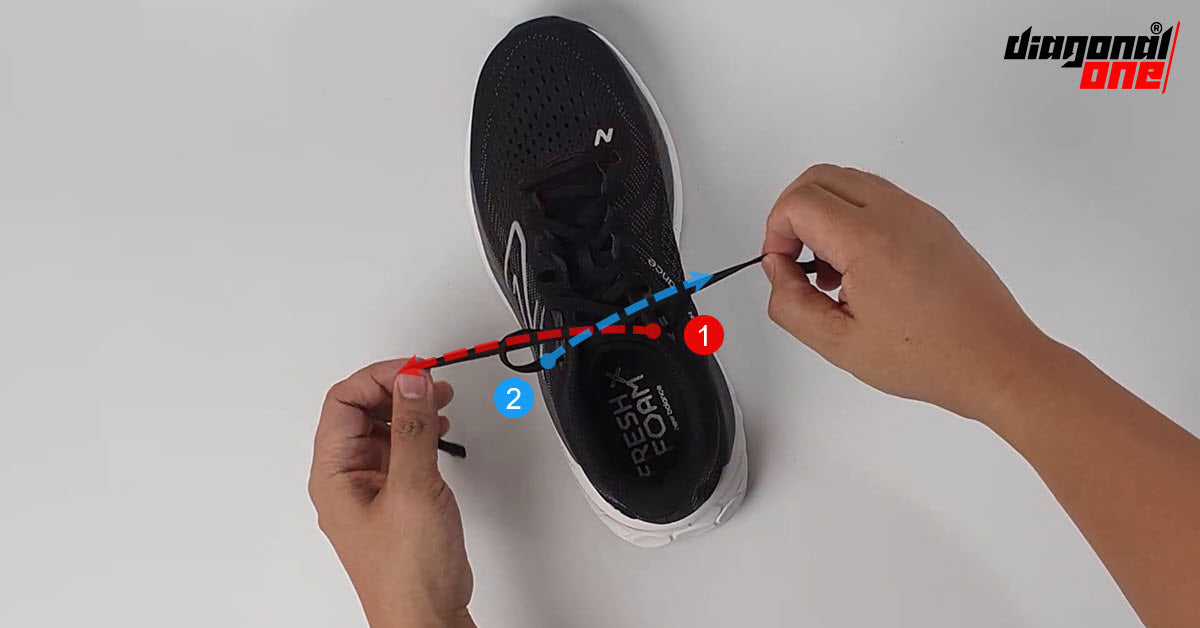
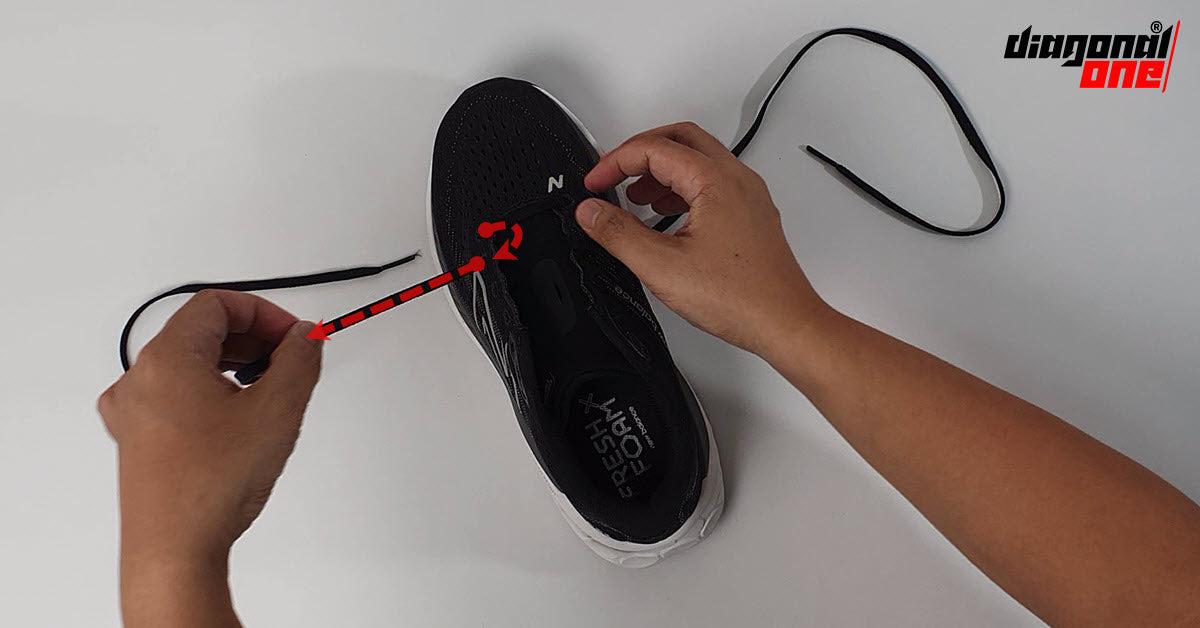
3 - Take one end of the lace and thread it through the loop opposite it.

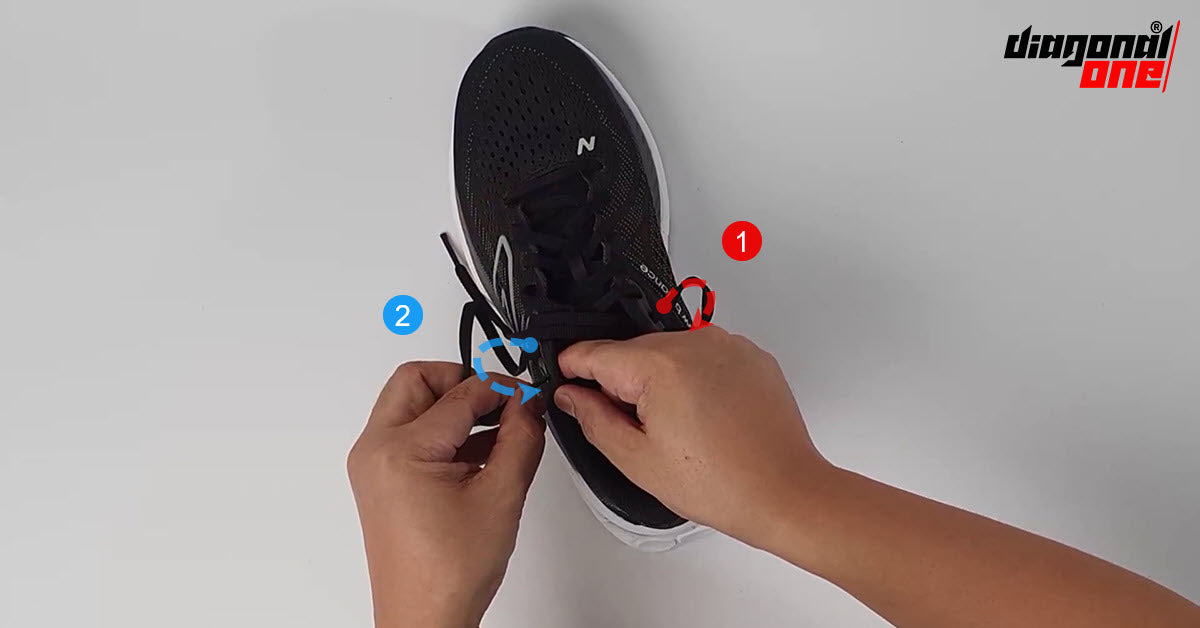
4 - Do the same for the other end. What this creates a mechanism that pulls the collar (opening) more tightly and makes the heel more snug.
5 - Tie your shoe as normal.
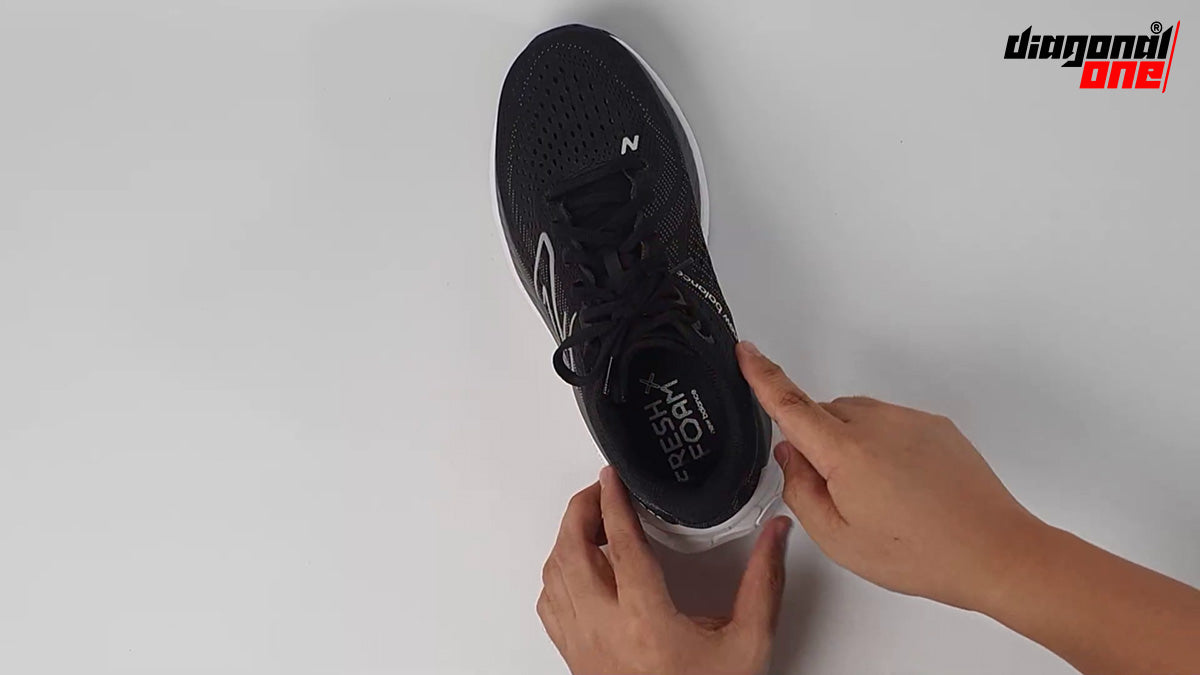
The result? A snug fit around your ankle that locks your heel in place, significantly reducing slippage and friction.
Straight-Lace Method
Next up on our roster is the straight-lace method, also known as straight lacing or bar lacing. This technique offers a clean look that works great for formal shoes or any footwear with an even number of eyelet pairs. Here's how to achieve this basic style:
1 - Run the lace straight across on the inside and out through the bottom eyelets.
2 - Take one end of the lace from the bottom then thread it through the next eyelet on the same side.
3 - Then, pass it over the tongue and over and through to the eyelet directly on the opposite side.
4 - Take the other end of lace straight up on inside, skip one eyelet then go through one eyelet higher up.
5 - Repeat until all eyelets are filled.
The beauty of this lacing pattern lies in its simplicity and symmetry. With less friction from crossing laces, you're bound to experience reduced wear and tear. Plus, the straight-lace method is a winner when it comes to style points.
Whether you're a fan of criss-cross, straight-lace or heel-locking methods, mastering these basic lacing techniques will transform your shoe-wearing experience from frustrating to fabulous.
Alternative Shoe Lacing Techniques
When it comes to stepping up your shoelace game, knowing a few alternative lacing methods can truly make a difference. Many of these are aesthetic or decorative. Two of the more popular alternative styles are the alternative straight-lace method and lattice method.
There are also shoe lacing patterns that help address fit issues aside from the heel-lock method, like lacing patterns for wide forefoot, .
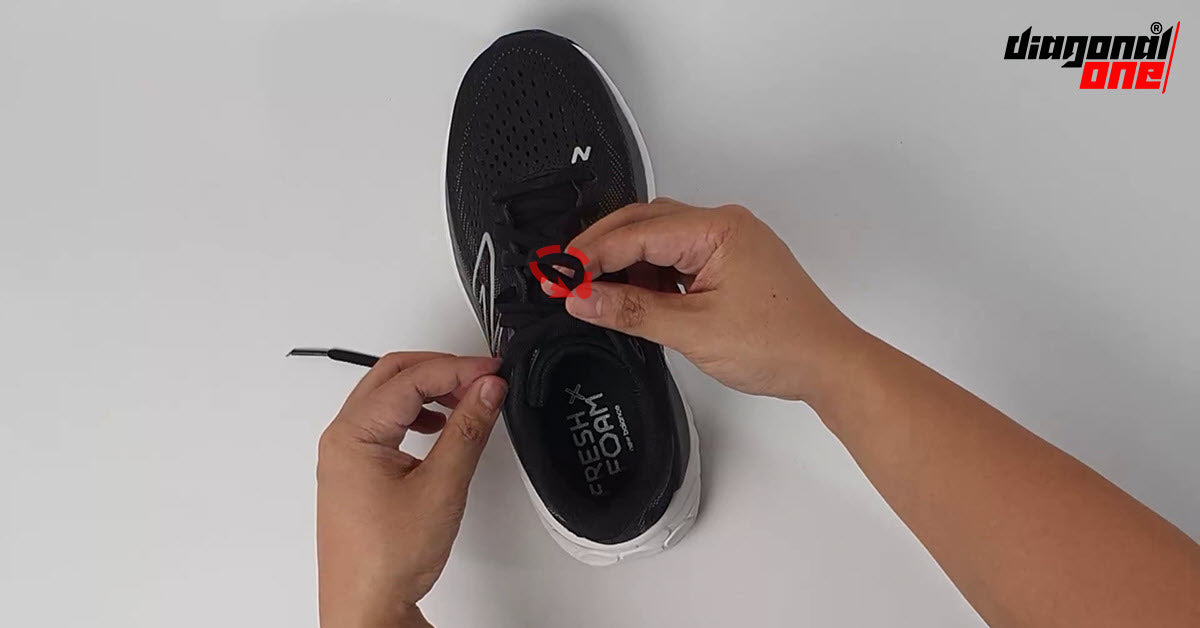
Tying the Bow
Tying the bow caps of your lacing effort by securing the laces in a knot. The conventional "bunny ear" bow continues to a favored way of tying laces. It's easy to undo and it's visually appealing.
To tie the bow:
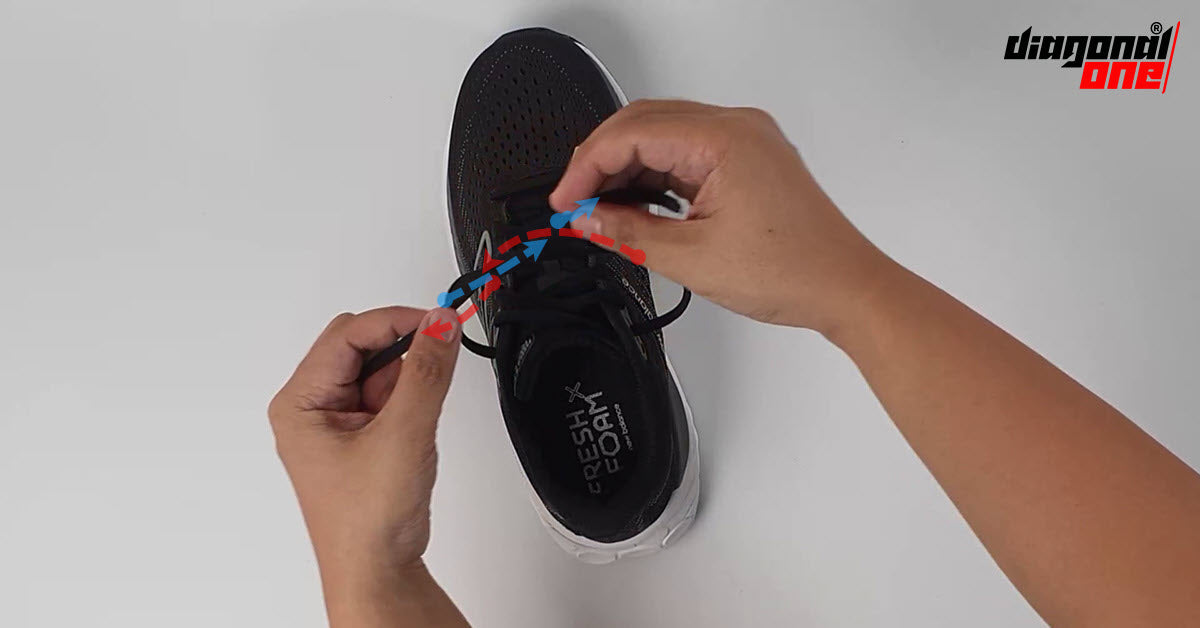
1 - Make an X with the laces over the top of the shoe, bringing one lace under and up like you would a standard knot.
2 - Form one lace into a loop or "bunny ear," leaving some length for the bow.
3 - Wrap the other lace around the loop, then push it through to form another loop.
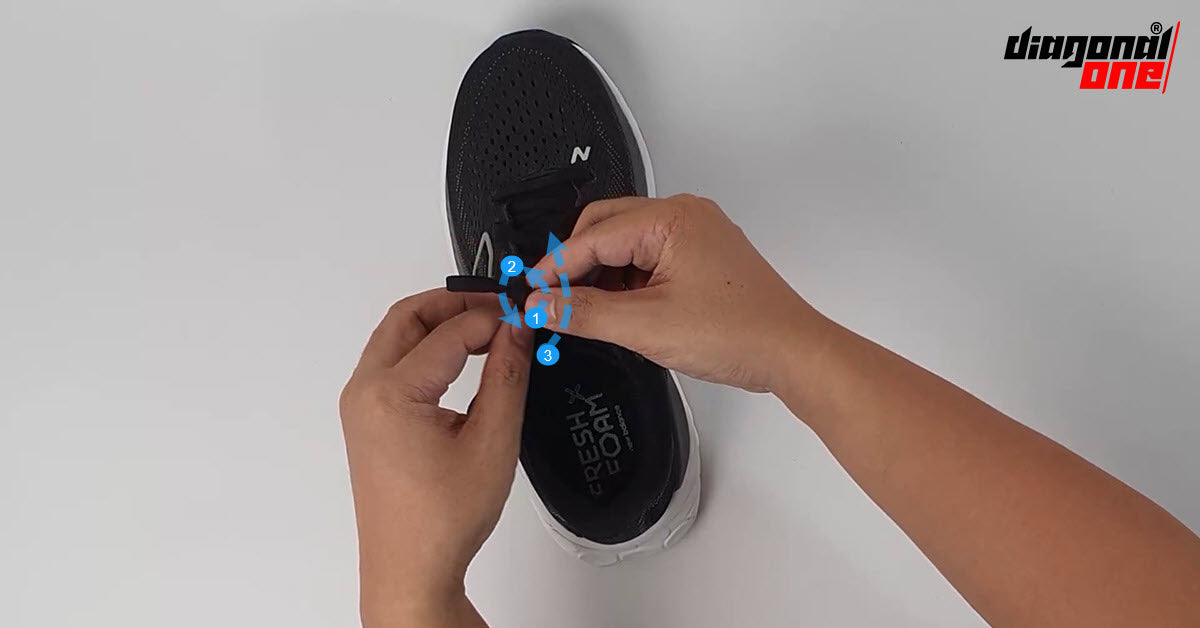
4 - Pull both loops (or "ears") outward to tighten. Pull tight until secure.
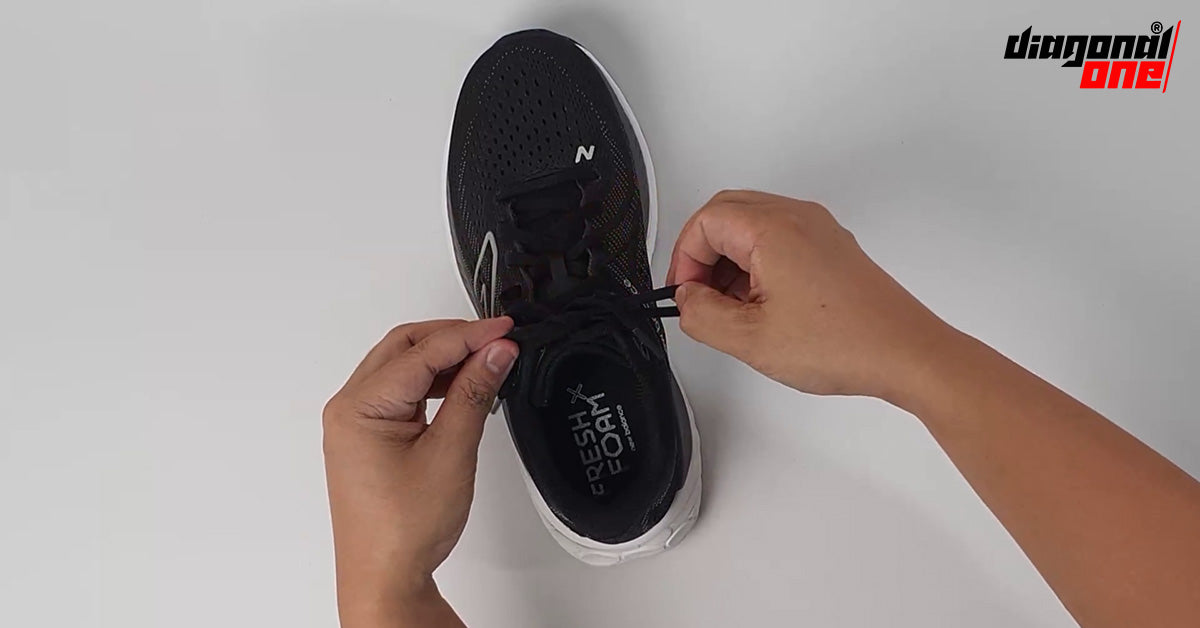
If you don't want to deal with your shoe laces getting undone, you can use no-tie shoe laces.
Tips and Tricks for Effective Shoe Lacing
Just like an artist with a brush, your shoelaces can be the tool that transforms your shoes into a comfortable masterpiece. Here are some tips to help you get the most out of your lacing experience.
1. Lace Up the First Two Eyelets Properly
Starting off on the right foot (pun intended), is crucial. The first two eyelets set the tone for your lacing journey. Ensure they're done up snug, but not too tight. This will give a secure base for the rest of your lace work.
2. Weave the Laces with Care
Weaving laces isn't just about going in and out of eyelets. It's about creating an effective tension system that gives both comfort and support. Pay attention so that the laces don't twist. If they do, take your time untwisting them every time you thread an eyelet and pull the lace through. Remember, it's not a race - take your time.
3. Understand How One Lace Crosses Over or Under
The way one lace crosses over or under another affects how tight or loose your shoe feels. With the criss-cross pattern, ensure that you alternate consistently. Experiment with different crossover techniques to find what suits you best.
4. Utilize the Tongue Loop
That little loop on the tongue of your shoe? That's not just for show. It's there to help keep your shoe tongue in place, improving fit and comfort. Don't neglect it - use it!
5. Considerations When Reaching Final Eyelets
As you reach the summit of your lacing journey, remember - it's all about balance. The final eyelets should feel secure without pinching or discomfort. If they're too tight or too loose, adjust accordingly.
Conclusion
We hope that in this quick dive into lacing your shoes, you've discovered the importance of learning this everyday skill. We explored different techniques like the criss-cross, heel-locking, and straight lacing methods, explaining their benefits along with step-by-step guides.
You should be able to use these to improve the comfort, support, and fit of your shoes. Feel free to experiment and find your own unique style.
After all, your shoes are a blank canvas – let them showcase your personality!